Monday, December 15, 2014

Oh Struffoli, we love you!


If there is one holiday dessert that is truly revered among many Italians, it is struffoli.  Since my childhood, my sister and I have been making struffoli with our mother and our grandma Sue. As an adult, I would prepare catering trays to happy customers every December. Suffice to say, for Italians, especially Neapolitans, this is a dessert that actually fills the air with excitement simply by discussing the preparation.

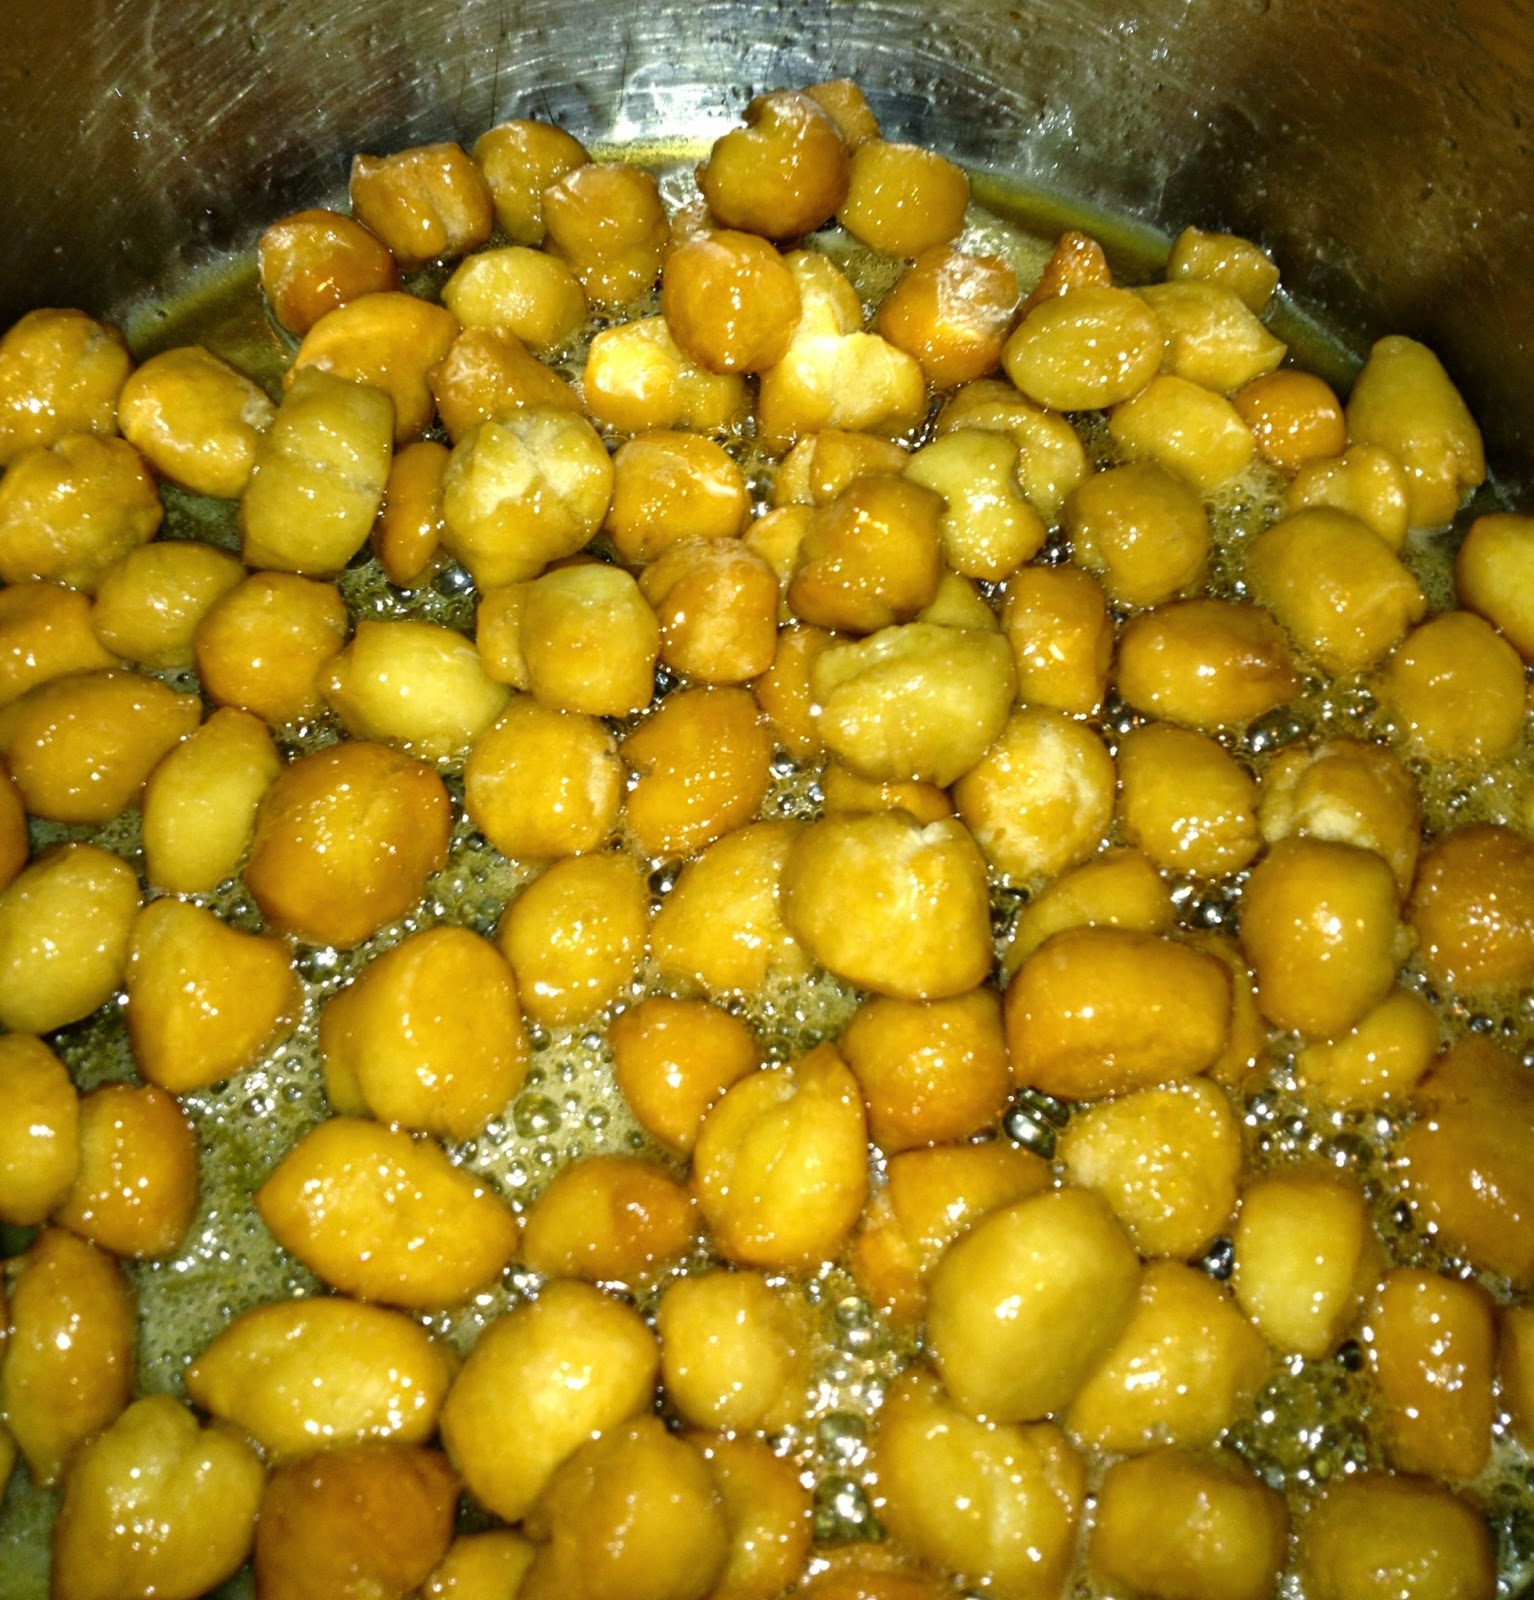
For those you who are not familiar with struffoli, they are a very traditional Italian Christmas treat that you have surely seen in local Italian bakeries and maybe even a holiday office party. First, a smooth dough is formed. Next, we roll the dough into strips in order to cut marble-sized balls. We then fry the dough balls to a tender crisp and bath them in sweet honey. Nonpareils are the grand finale in making this a festive dessert keeping with the spirit of the holiday.

There are many recipes out there for struffoli and also a lot of opinions on the very best way to prepare the dough. Some Italian-Americans keep it simple and use just flour and water. Other families prefer a richer dough and compliment the struffoli with citrus zest and limoncello. My recipe has a bit of a cookie texture. We use baking powder as a leavening agent, and this allows the struffoli to puff nicely while frying in the oil.

No matter what recipe you use, struffoli will lead the way toward a Merry Christmas and a Happy New Year. I want to thank so many of my readers and followers who emailed me requesting the recipe for this tantalizing dessert. It is my pleasure to respond during this season where struffoli is among the most anticipated of holiday foods.

My best wishes to one and all during this joyous season!

Recipe for Struffoli

2 pounds flour (all purpose)

1 cup sugar

3 1/ 2 teaspoons baking powder

7 extra large eggs

1/3 cup shortening ( I use Crisco)

1 ounce vanilla extract

Canola oil

Honey

Nonpareils

Add flour, sugar, baking powder, eggs, shortening and vanilla to bowl of electric mixer. Using paddle attachment, mix until a dough forms. Scrape down the sides as needed.


Special note** Don't despair if you don't own an electric mixer. Neither did the phenomenal cooks and bakers of past centuries! Just form the flour on a clean work surface in a circular shape in order to have an empty well in the middle. Add sugar and baking powder along the circle of flour. Crack the eggs into the middle of the well. Add the shortening to the eggs in small spoonfuls. Pour the vanilla into the eggs. With your hands, slowly mix the ingredients together until a smooth dough forms.


Wrap the dough in a kitchen towel to prevent drying while you work.


Cut the dough into one portion at a time.


On a floured work surface, roll each portion into long strips the size of an index finger.


Cut the strips into marble-sized pieces.


Flour lightly along the way! This will keep the struffoli from sticking together.


Fill a large pot with canola oil three quarters of the way. Heat the oil to 375 degrees or test it by lightly tossing in one struffola. If it sizzles then your oil is ready for frying! Handling the struffoli gently, fry them in batches to a golden brown.


Using a slotted spoon, transfer each batch to a tray covered with paper towels.


In a pot, warm honey to bubbling and add the fried struffoli in batches. Coat the struffoli well in the honey. Keep adding and warming honey with every new batch.


 Arrange the struffoli attractively on a tray in any way that meets your mood! You can shape them in a wreath, or a pile them pretty in a mound. And be sure to use your favorite Christmas dish!


Sprinkle with nonpareils.
 Serve them to your lucky guests, and have a very Merry Christmas!


Friday, November 21, 2014

Happy Thanksgiving!

On this Thanksgiving, I am grateful for the special people that I have been blessed to cook for and especially for my family and friends who will share the Thanksgiving table with me.
There are countless recipes for trimmings that surround the turkey, but for this blog post I am going to share some basic pointers that will yield a simply delicious and moist bird.
From my family to yours, I wish you a Happy Thanksgiving!

1. Invest in a good roasting pan. It will last you for years.
2. If your budget allows, go organic. This is just pure flavor and the real taste of turkey.
3. It will take you about three days to defrost a 12-pound turkey. Defrost it in the refrigerator while still in the packaging.
4. Handle a raw turkey with the same care as raw chicken.
5. The size of your turkey should be about one pound per guest minimum.
6. If you choose to fill your turkey with stuffing, fill it loosely into the cavity. This will allow an easy air flow and proper heating.
7. Excessive basting simply serves to moisten the skin of the turkey but does not really penetrate to the meat. Save the greater part of your basting until the end of roasting time in order give your skin a nice golden color.
8. Your turkey is done when your meat thermometer reads 170° F while inserted into the thickest part of the turkey breast. The turkey juices should be clear.
9. Allow the turkey to settle for 30 minutes before carving.
10. When you are finally sitting down with your family and friends to give thanks, I suggest a Pinot Noir or Riesling, and then toast to the beautiful things in your life!

Sunday, October 19, 2014

Anthony and the Lobster Rebellion


Anthony and the Lobster Rebellion


            A summer getaway to the New Jersey Shore is a favorite pastime for my family. Relaxing days in a lovely beach house, right on the water, are a great way to enjoy each other’s company and share heady meals.
            For me, cooking up a fresh seafood dinner to go along with the coastal spirit of the getaway begins with a simple walk down the road to the local fishmonger. Upon my return, everyone knows it is time for red lobster sauce with linguine. And always, when I make this sauce, my brother, Anthony, dramatically tells the story of “The Lobster Rebellion.”
            From my parents, right down to the youngest grandchild, this is a story that we have come to anticipate well. We also know that lobster is a costly luxury, thus the reason for my brother’s entertaining recital as part of the lobster dinner. As you will read, Anthony’s tale highlights a certain irony.
            First, picture a large table with an enthused family of three generations enjoying bowls of linguine topped with a robust, velvety red tomato sauce laced with the incomparable flavor of lobster. On the table are platters of enticing lobsters about to be cracked and consumed with great appreciation of the sweet, moist lobster meat popping out of the shells.
            Anthony’s story begins in the pre-Revolutionary era. He tells of a prison facility in New England where the lobsters were so abundant that they would crawl all over the shore. The prisoners were served lobster three times daily, seven days a week.
They also worked the soil and used lobsters as fertilizer. Suffice to say, most of their world was lobster each and every day.
            My brother continues his wild tale of how the prisoners were enraged and would not stand for such treatment. They organized a prison revolt because they never wanted to eat another lobster for the rest of their lives. Anthony never does tell the ending to the story, whether the prisoners ever receive the right to eat a different type of food. He simply wants us to assume whatever conclusion we may imagine.
            So, as we are all enjoying the succulent taste of the lobster sauce, we are also envisioning a group of angry men jumping up and down on tables and chairs in a prison cafeteria. They never want to eat another bite of what we are currently enjoying so immensely.
            When I sat down to write this story
, I called my brother at his office. “Tell me all the details of that lobster story. I want to include it in my book.”
My brother laughed. “I have no idea if it is even factually correct!”
            My brother went on to tell me that his friend Frank Kazeroid told him a version of the story many years ago, obviously trying to convey the same message. I sat there visualizing Frank, Anthony, and their colleagues enjoying an expensive lobster dinner, perhaps in some upscale New York City restaurant, while Frank told of disgruntled New England prisoners forced to eat lobster.
            My brother promised to phone Frank and ask him to recall his version of “The Lobster Rebellion.” Well, here is what Frank told us: During the Middle Ages and Renaissance, people appreciated lobster. However, modern Europeans and Americans did not hold this crustacean as a popular item. Along the northeastern coast of the United States, the lobster was so common in the seventeenth and eighteenth centuries that it was considered a “junk” food. When caught in great quantities or stranded on shore after severe storms, lobsters served as garden fertilizer and as a food staple given to widows, orphans, indentured servants, and especially prisoners. It was plentiful and cheap, and used in place of proteins that were of more value, so much so that a group of Massachusetts servants decided to take a stand and do something about the situation. They took their owners to court and won a judgment that lobster not be served to them more than three times a week. Eventually, Massachusetts passed a law forbidding its use more than twice a week, citing that a daily lobster dinner was considered cruel and unusual punishment.
            The good news is that my linguine with lobster sauce is the opposite. For our family, it is forever linked to warm family vacation dinners on the shore and my brother Anthony’s memorable tale of “The Lobster Rebellion.


My lobster sauce recipe boldly calls for a long simmer. This is against the rules and laws of seafood cooking because shellfish will become tough if cooked for a long duration of time. However, in my long experience, I have found that it is ok to go against standard cooking rules as long as one has a tested strategy that yields success. Rather than cooking the whole lobster in the sauce, I opt to cook only the upper body, legs and claws.  The tail of the lobster has a great amount of meat that will surely toughen upon a long simmer. Have your fishmonger cut the tails away from the lobster. You can use them for a recipe where they can be stuffed and baked with a filling of your choice or even steamed and enjoyed with clarified butter. The small amounts of meat inside the upper body, legs and claws will remain sweetly moist, and the taste of your sauce may possibly go down in the memory of your guests as the best they ever tasted.

3/4 cup extra-virgin olive oil
1/8 teaspoon crushed red pepper flakes
3 fresh lobsters, each about 1 1/2  pounds (tails removed)
8 garlic cloves, peeled and crushed
3/4 cup dry white wine
3 28-ounce cans crushed tomatoes
Kosher salt and freshly ground black pepper
Fresh flat-leaf parsley, chopped
 In a large pot, warm olive oil over medium heat. Sprinkle in the crushed red pepper flakes and allow to sizzle and flavor the oil. Add the lobster pieces and cook until bright red, about ten minutes. Mix garlic to the lobster and toss about in the oil. Pour the wine, and allow the liquid to evaporate. Add the crushed tomatoes, salt and pepper. Simmer, stirring occasionally, over medium-low heat for two hours. Serve the lobster sauce over linguine or spaghetti and sprinkle with parsley. Arrange lobster pieces on platters for cracking.

Camille’s Tip: We never want to waste that scrumptious meat in the thin legs of the lobster. After the lobster is cooked, flatten out the legs and roll over them with a rolling pin. The lobster meat will slip right out.

Friday, May 9, 2014

Coconut Shrimp is here!


Coconut Shrimp and Apricot Dip


During my time as a restaurant owner, we would host Hawaii night. The entire staff would wear hula skirts and leis, and our menu was a festive array of Hawaiian appetizers and entrées. One of the greatest people to work with me was my dear friend Johnny. In the kitchen, Johnny and I would prepare coconut shrimp while the rest of our kitchen staff prepared everything else. It was Johnny’s idea to soak the shrimp in coconut milk. He and I gave careful attention to the shrimp, as so many of our customers looked forward to ordering it. The Hawaii evenings are a thing of the past, but I still prepare this festive dish often.

A few weeks ago, coconut shrimp was part of my menu at Yellow Hook Grille, a warm and inviting establishment in the heart of Bay Ridge offering an eclectic beer menu and among the largest outside seating areas in the NYC metropolitan area. The owners graciously invited me to be a guest in their kitchen for a one-day event to support my son's foundation helping children with cancer. www.FrankiesMission.org. While the event was Italian themed, the coconut shrimp was a smooth addition by simply adding basil and also balsamic vinegar in place of soy sauce. Suffice to say, it was a hit as one and all enjoyed the WOW flavors!

The following recipe is the original, and this along with other fulfilling recipes can be found in my cookbook, Foodships: Living Life, One Recipe at a Time

Enjoy!

2 pounds jumbo shrimp, peeled and deveined, with tails left on
2 cups, plus 1/2 cup coconut milk
3 eggs
2 cups panko bread crumbs
2 cups coconut flakes
Kosher salt and freshly ground black pepper
1 cup flour
Vegetable oil, for frying

In a bowl, combine shrimp with two cups of the coconut milk, making sure that shrimp is well covered. Chill for one hour. In a shallow baking dish, whisk remaining coconut milk with eggs. In a separate shallow baking dish, mix panko bread crumbs and coconut flakes. Sprinkle salt and pepper in flour. Dredge shrimp in flour, then coconut milk–egg mixture, then panko-coconut mixture. Shake off excess between each dredging. In sauté pan , warm vegetable oil over medium heat. Fry shrimps in batches, without overcrowding, until golden. Serve warm with apricot dip.


Apricot Dip
1 tablespoon canola oil
2 scallions, sliced thin
Pinch of red pepper flakes or a few shots of Tabasco sauce
2 tablespoons soy sauce
2 cups apricot preserves

Heat the canola oil in a small saucepan. Add scallions and red pepper flakes. Allow to cook for a few minutes, until sizzling. Add soy sauce and apricot preserves. Allow to simmer for ten minutes. Serve warm with the coconut shrimp.

Camille’s Tip: This recipe also goes very well with chicken in place of the shrimp. Just cut chicken breast into finger slices or medallions.